
Thank you for using the Allied Packaging order entry web site. The following contains a complete tutorial on using our web site.
Table of Contents:
Click the links in the table of contents to go directly to a section in this tutorial:
- Registering Your Account
- Logging In
- Adding Items to Your Order
- Reviewing / Modifying Your Order
- Checking Out
- View Order Status
- Proofing
You will receive an email message from Allied Packaging that has two links to our web site. Click the first link if the color of the link appears red, otherwise click the second link.
When you click on one of the links in the email message you will be taken to the following screen:
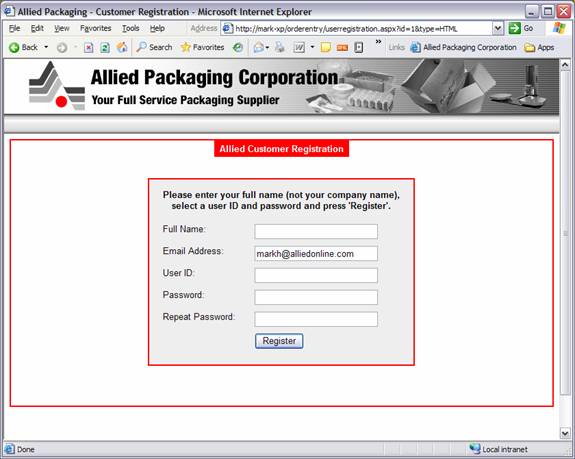
You are required to enter your full name (please use your own name and not your company’s name).
Choose a user ID and password and click the “Register” button. If the user ID you chose is already taken you will be asked to select another.
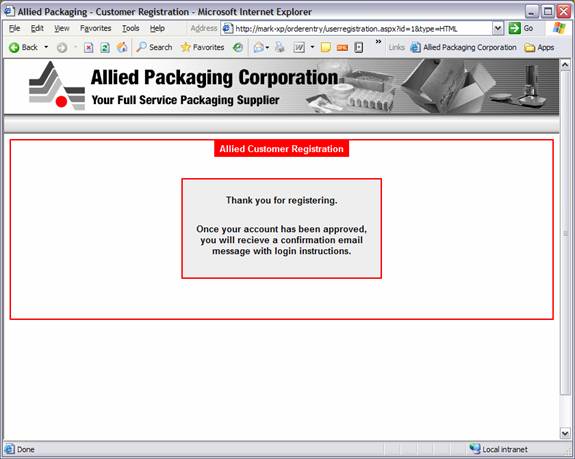
After you click the “Register Button” you will see the following screen:
You will receive an email message that looks like the following after your registration information has been reviewed:
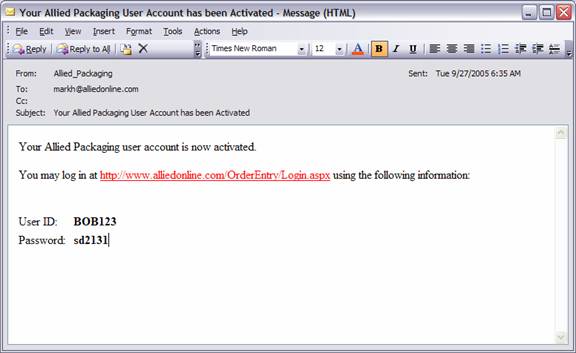
Click on the link in the email message to log into the site and enter orders.
Use your web browser to go to http://www.alliedoline.com. You will see a web page that looks like the following:
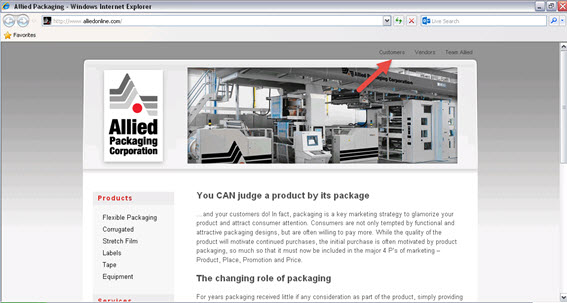
Click on the link at the top right of the page that says “Customers”. When you click the link you will see the following screen:

Enter the user ID and password you used to register your account. Please note that your password is case-sensitive. When you have entered the user ID and password press the “Log In” button. When you have successfully entered your user name you are ready to begin adding items to your order.
After logging in you will see the following screen:
In the upper left you will see your user ID and company name. If these are not correct, please contact customer service before continuing.
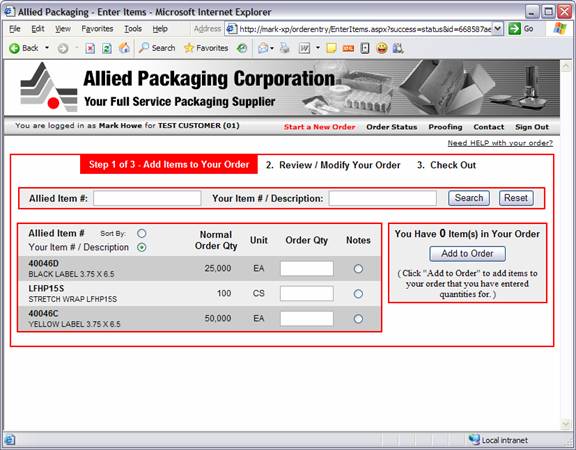
The upper right portion of the screen contains the main menu. You will notice that the words “Start a New Order” are highlighted – this means that you are on the page for starting a new order.
Below the main menu you will see a red border with a red tab highlighting the words “Step 1 of 3 Add Items to Your Order”. This tab is used to track your progress through the ordering process which has three steps.
Below the red tab is a search bar. The search bar allows you to find items using Allied’s item number or your own item number. To use the search bar, enter an item number in one of the boxes and press search – the item display below will be changed to reflect your search results. To make the item display show all items once again press the “Reset Button”.
The item display below the search bar is used to add items to your order. At the top of the item display is a small toggle that allows you to sort the list of items by either Allied’s item number or your item number. The default sort is your item number.
To add items to your order, simply enter quantities in the “Order Quantity” boxes next to the items you wish to order and press the “Add to Order” button on the left side of the screen. After pressing the “Add to Order” button you will be taken to the screen that allows you to modify your order quantity and add notes.
Reviewing / Modifying Your Order.
After pressing the “Add to Order” button or pressing the “Review Order” button on the main menu you will see the following screen:
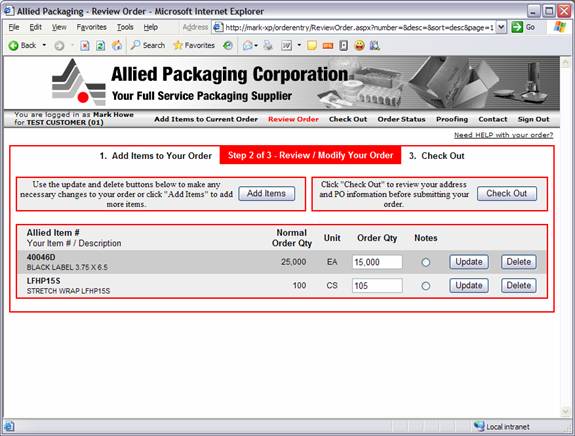
If you need to add more items to your order press the “Add Items” button on the left below the red tab. Pressing the “Add Items” button takes you back to the screen where you can add items to your order.
If you want to change the order quantity for an item, change the quantity in the “Order Qty” column next that item and press the “Update” button. The screen will refresh and show your new quantity in the “Order Qty” column. The screen will also tell you that your order had been updated.
If you want to add notes to an item, click the small circle in the notes column next to the item you need to add notes to. After pressing the note circle you will see the display change to following:
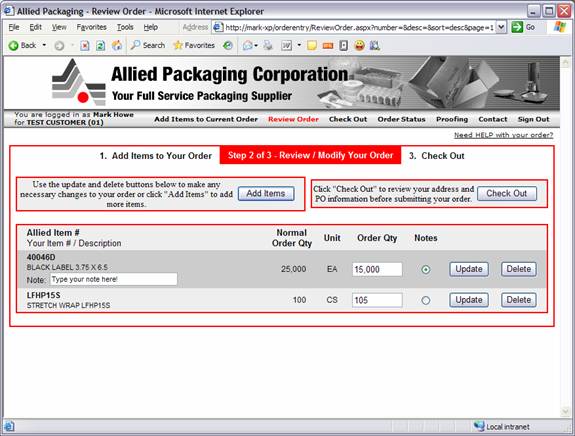
To add your note, simply type your note into the newly displayed text box next to the word “Note:” below your item. When you have finished entering the note, press the “Update” button on the right. Pressing the “Update” button will cause the screen to refresh and show the words “Your order has been updated.”
If you need to remove an item from your order, press the delete button on the far right side of the screen.
When you are done making changes to your order, press the “Check Out” button on the upper right side of the screen.
Pressing the “Check Out” button on the Review Order page or pressing the “Check Out” link on the main menu will take you to the following screen:
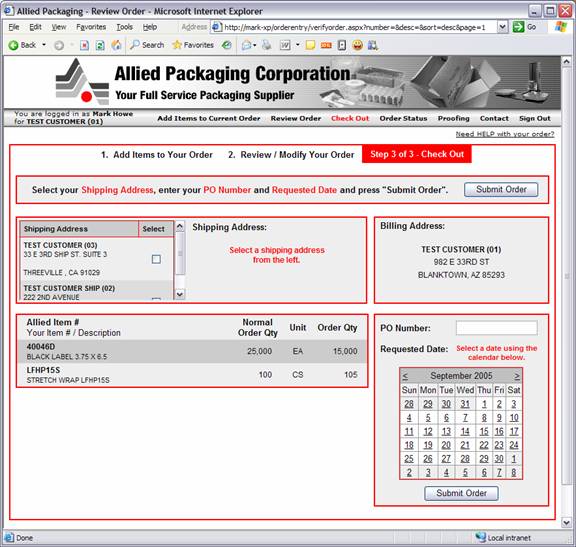
Before submitting your order you need to select a shipping address, enter a PO Number (if you have one) and select a requested date.
To select your shipping address, press the check box next to the address you wish to use. If the shipping address you need is not listed, please call customer service.
After selecting a shipping address, enter your PO number in the box provided in the lower left side of the screen.
Once you have entered your PO number, use the calendar in the lower left to select your requested date. The arrows to the right and left of the month allow you to change the month that is displayed in the calendar. If you enter a date before the current date, the calendar will automatically change the date requested date to the current date.
Now that you have a date selected press the “Submit Button” below the calendar or the “Submit Button” at the top right to submit your order to Allied. The screen below will display after submitting your order.
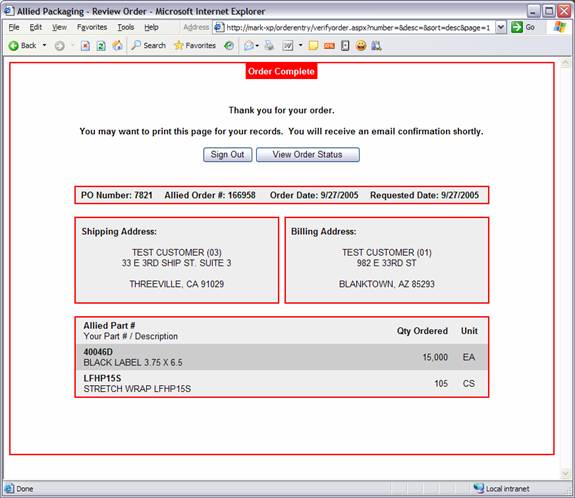
To print this page, use the print button or print menu option in your web browser. You will also receive an email message that contains the same information that is on this screen.
At this point your order is complete and you may sign out by pressing the “Sign Out” button or you view can your previously web-entered orders by pressing the “View Order Status” button. Pressing “Sign Out” will log you off the system and take you back to the log in screen. Pressing “View Order Status” will to you to a screen where you can view your open orders that were entered on the web site.
Pressing “View Order Status” link on the main menu will take you to a screen that looks like the following:
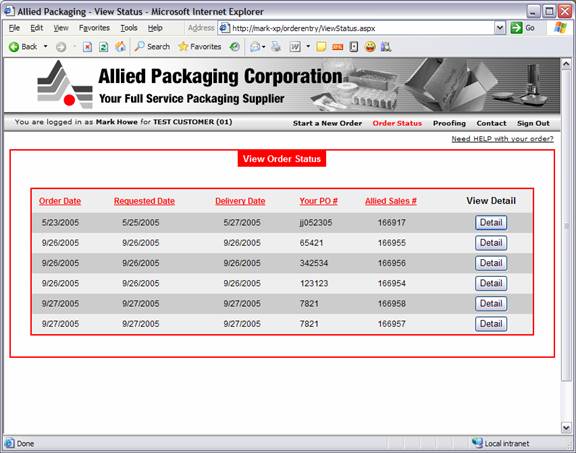
This display shows all of the open orders you have entered on the web site. Pressing column headers will sort the orders by that column. Pressing the same column header twice will reverse the order of the sort.
Click the “Detail” button next to the order you wish to view. When you click the “Detail” button the following screen will appear.
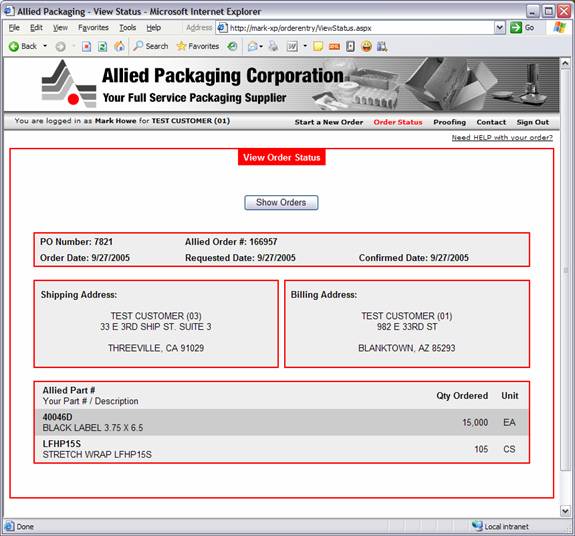
Click the “Show Orders” button when you are done viewing the order detail to return to the list of orders.
If you have items that require artwork from Allied, you may receive an email message that looks like the following when a proof is ready for your review:
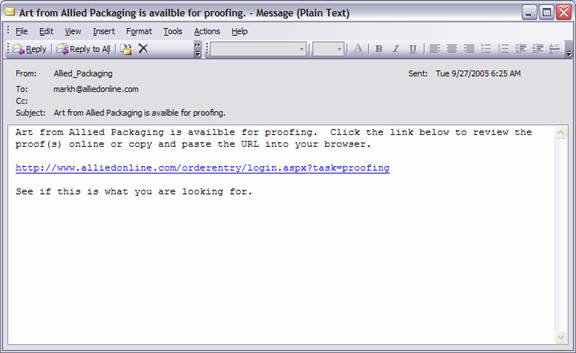
Click on the link in the email message. You will be required to log into the web site (see the section about logging in at the top of this document). After logging in you will see the following screen:
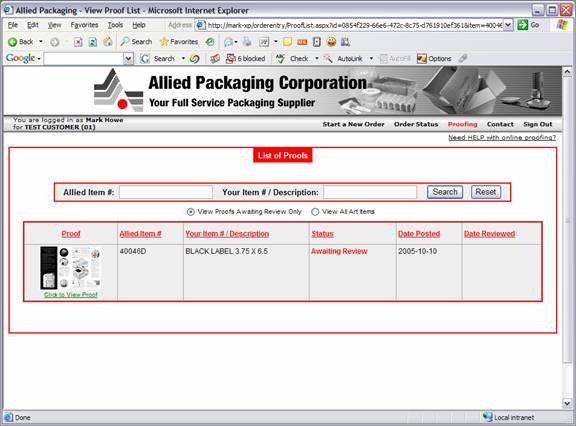
The proofs that are awaiting your review will be listed. Click the thumbnail image to review the proof. When you click the thumbnail image, you will see the following screen (this may take a few moments if the file size of the proof is large):
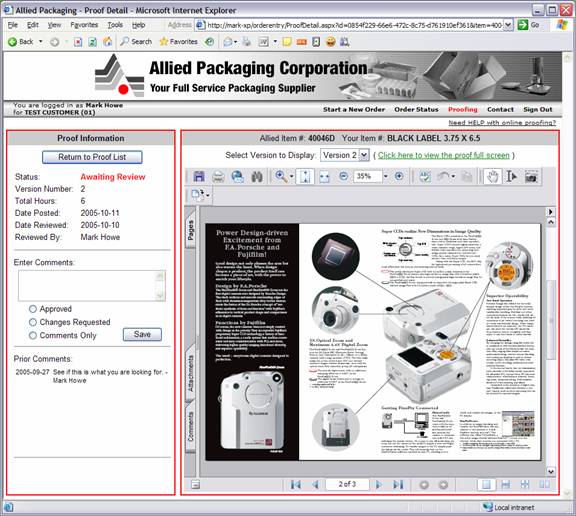
If the proof does not appear in the window like in the screen above, click the green link next to the version drop-down box that says “Click here to view the proof full screen”. (If you are using a Mac the link will say “Click here to download/view the proof”). When you click the link, the PDF will be downloaded to your machine and should open automatically using your normal PDF viewer.
After reviewing the PDF file, enter your comments in the comments box on the left side of the screen. Please click “Approved”, “Changes Requested” or “Comments Only” below the comment box and press “Save”. Pressing “Save” will send your comments and approval or change request back to Allied and will show the following screen (In this sample the user chose to approved the proof):
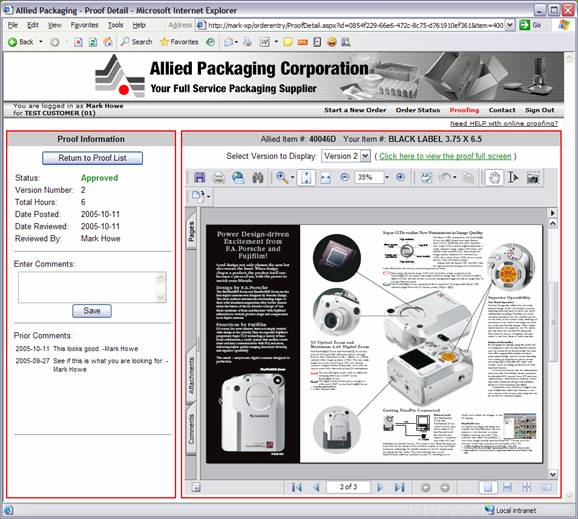
Click the “Return to Proof List” button to see if there are any more proofs that you need to review. Follow the same process if there are more proofs to review.